Documentation Index
Fetch the complete documentation index at: https://payglocal.mintlify.app/llms.txt
Use this file to discover all available pages before exploring further.
Not logged into GCC yet? Start at PayGlocal Dashboards first.
Why Do You Need Credentials?
PayGlocal uses a JWT token-based integration model for every API call. Before your payment request reaches PayGlocal’s servers, it goes through two steps:Encrypt your payload (JWE)
Your payment data is encrypted using PayGlocal’s public key so only PayGlocal can read it.This produces a JWE token — a 5-part encrypted blob in the format
header.encryptedKey.iv.ciphertext.tag.Sign the encrypted payload (JWS)
The JWE is then signed using your private key to prove the request came from you.This produces a JWS token — a 3-part signed token in the format
header.payload.signature.| Credential | Role in the flow |
|---|---|
| PayGlocal’s Public Key | Encrypts your payload → only PayGlocal can decrypt |
| Your Private Key | Signs the request → proves it came from you |
| Public Key ID (KID) | Tells PayGlocal which key was used to encrypt |
| Private Key ID (KID) | Tells PayGlocal which key pair to verify the signature against |
| Merchant ID (MID) | Identifies your merchant account on every API call |
How to Get Each Credential
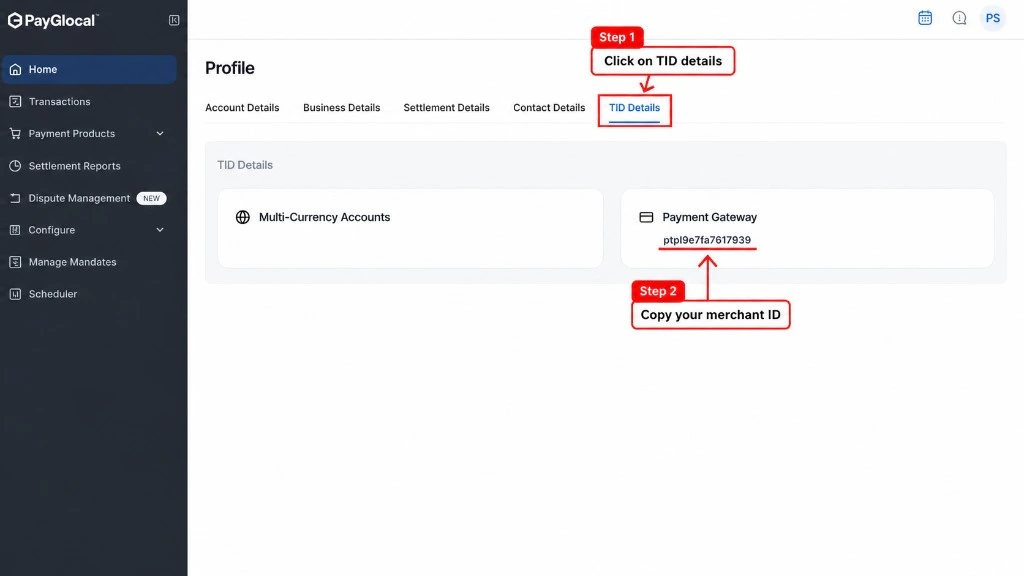
Merchant ID (MID)
Log in to your GCC dashboard
Open GCC UAT or GCC Production.
Open My Account and go to TID Details
Click your profile icon in the top-right corner of the dashboard, then click My Account.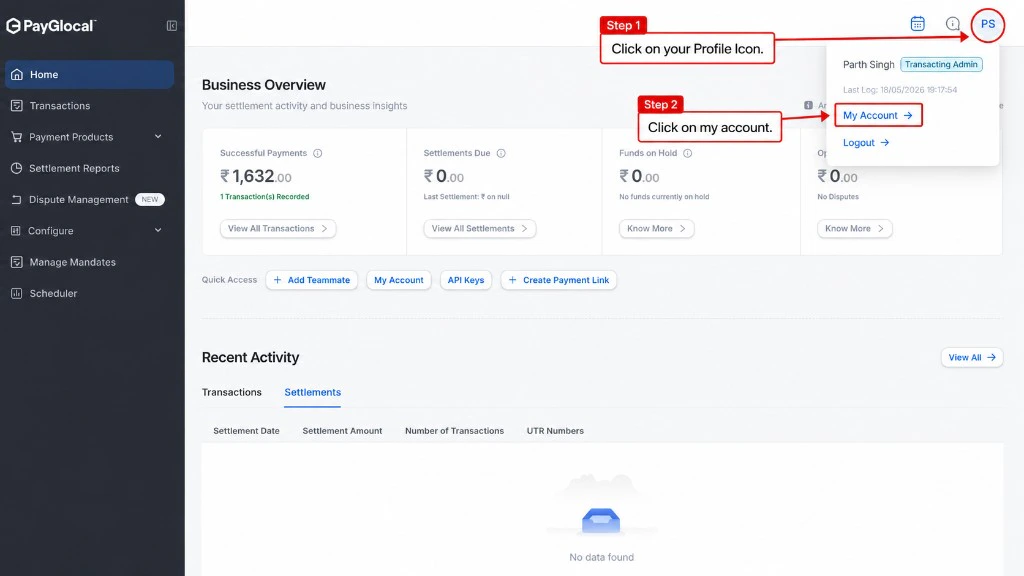
Public Key & Private Key
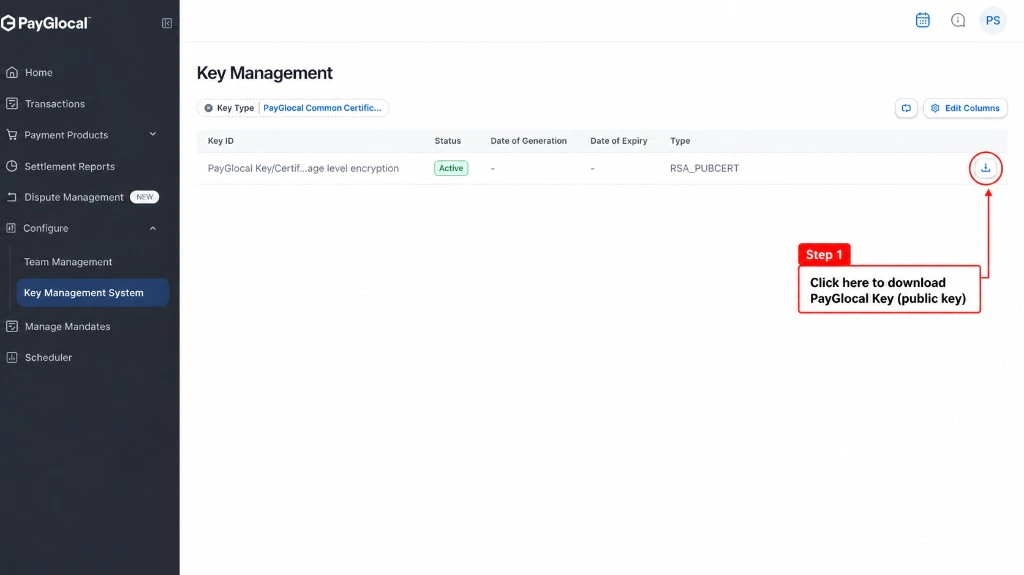
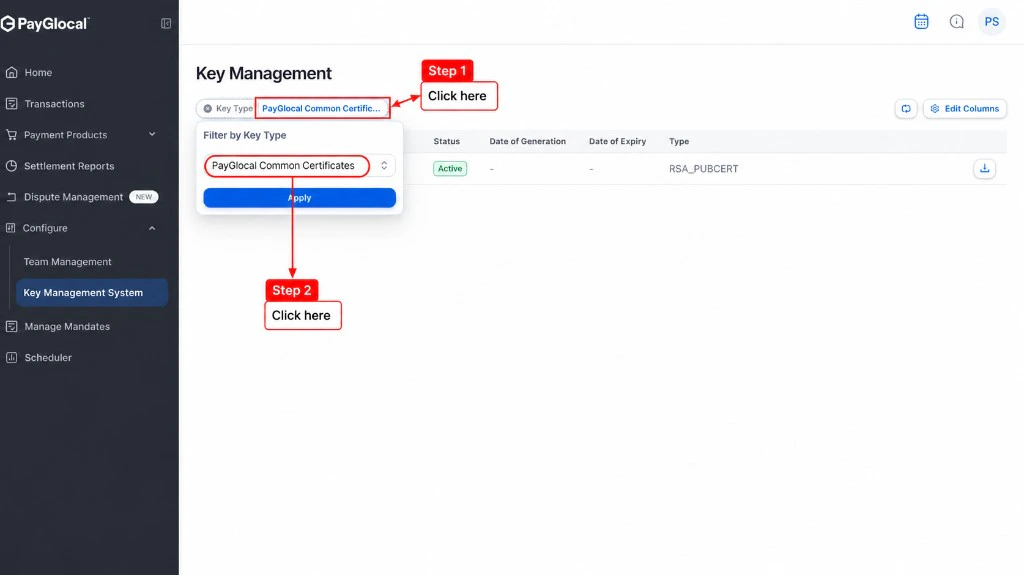
Both keys are managed from the Key Management System in GCC. You’ll download PayGlocal’s public key first, then generate and download your own private key.Downloading Public Key
Navigate to Key Management System
In the left sidebar, click Configure.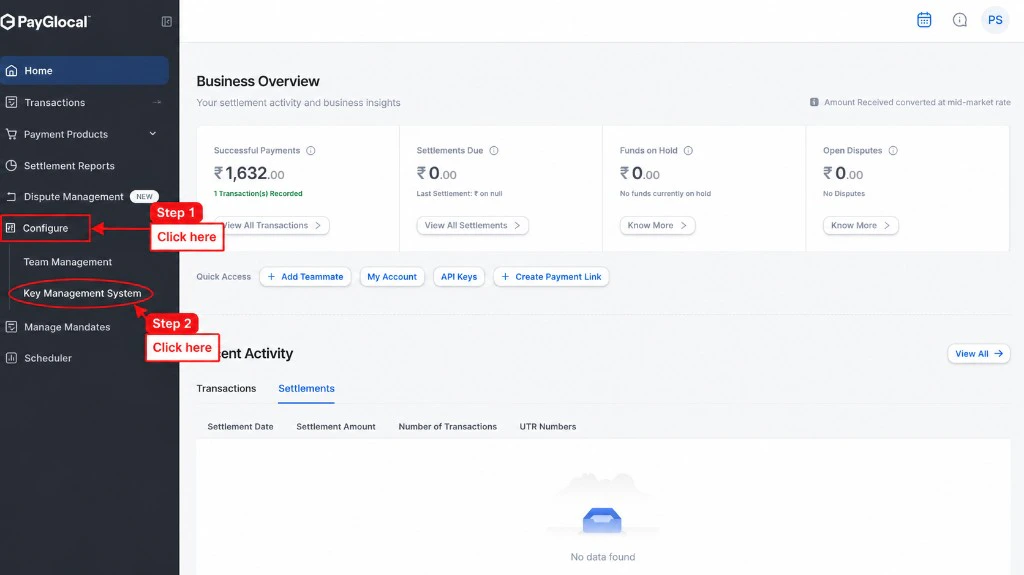
Downloading Private Key
Generate RSA Key
Click the Generate RSA Key button in the top-right corner. This creates a new RSA key pair.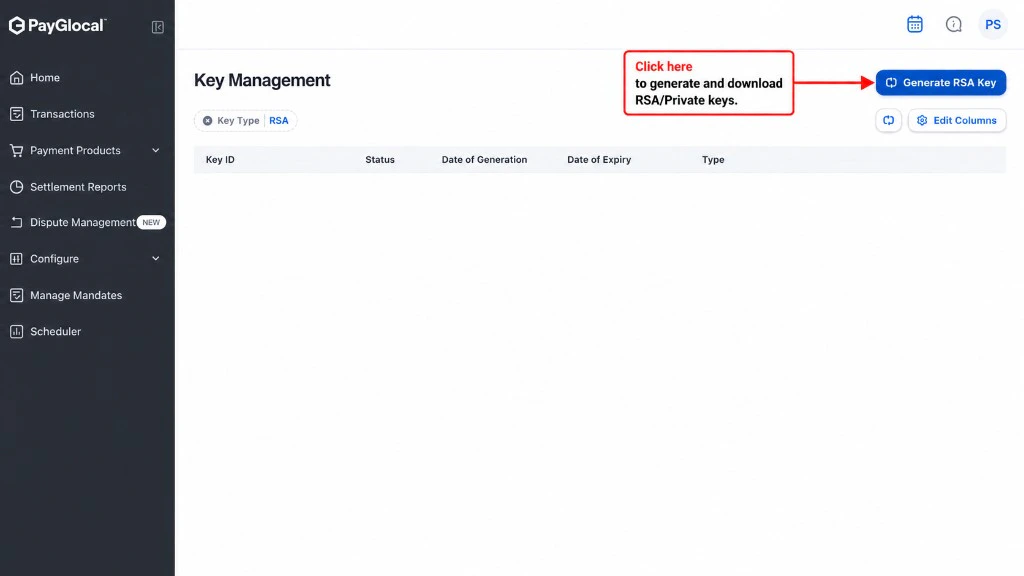
Key IDs (Public KID & Private KID)
You don’t have to hunt for Key IDs separately — each is embedded in the filename of the file you downloaded. The Private Key ID is also shown directly in GCC.Fetching Public Key ID
The Public Key ID is embedded in the filename of PayGlocal’s certificate you downloaded from GCC.Go to your Downloads folder
Navigate to the folder where the PayGlocal public key was downloaded (usually your Downloads folder).
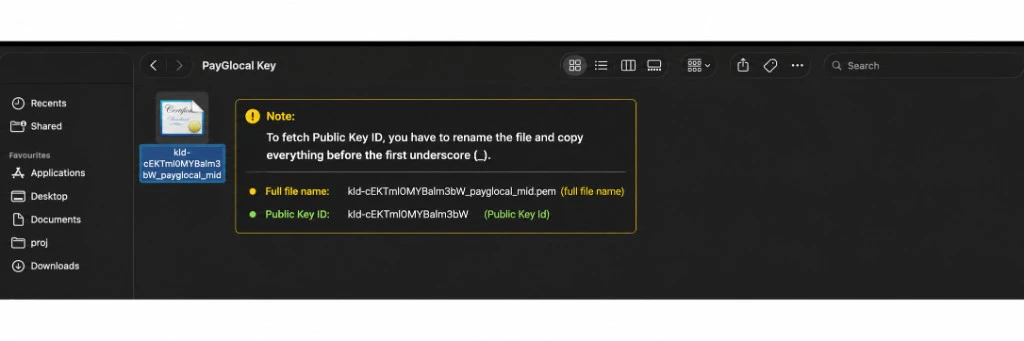
Copy everything before the first underscore
The Public Key ID is everything before the first underscore (
_).Example:- Full filename:
834hinrh-8r0n-4657-34nn-fnjhjre33uur_glocal.pem - Public Key ID (KID):
834hinrh-8r0n-4657-34nn-fnjhjre33uur
Pro tip: Right-click the file → Rename → copy just the Key ID part (everything before the first
_), then press Escape so you don’t actually rename the file.Fetching Private Key ID
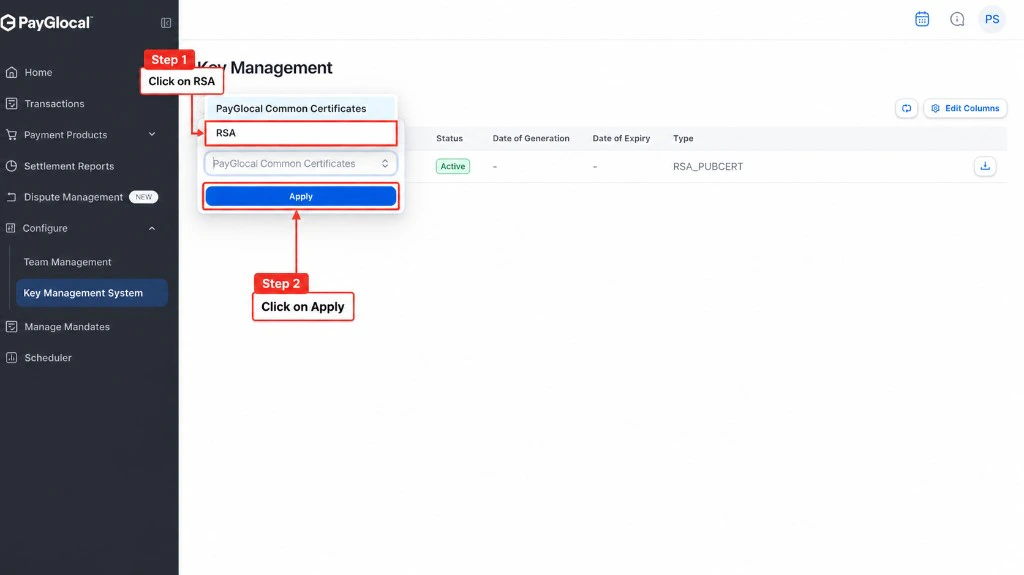
Unlike the Public Key ID, your Private Key ID can be fetched directly from the GCC dashboard where you generated the RSA key.Go to Key Management (RSA section)
Navigate back to Configure → Key Management System and filter by RSA (where you generated your private key).
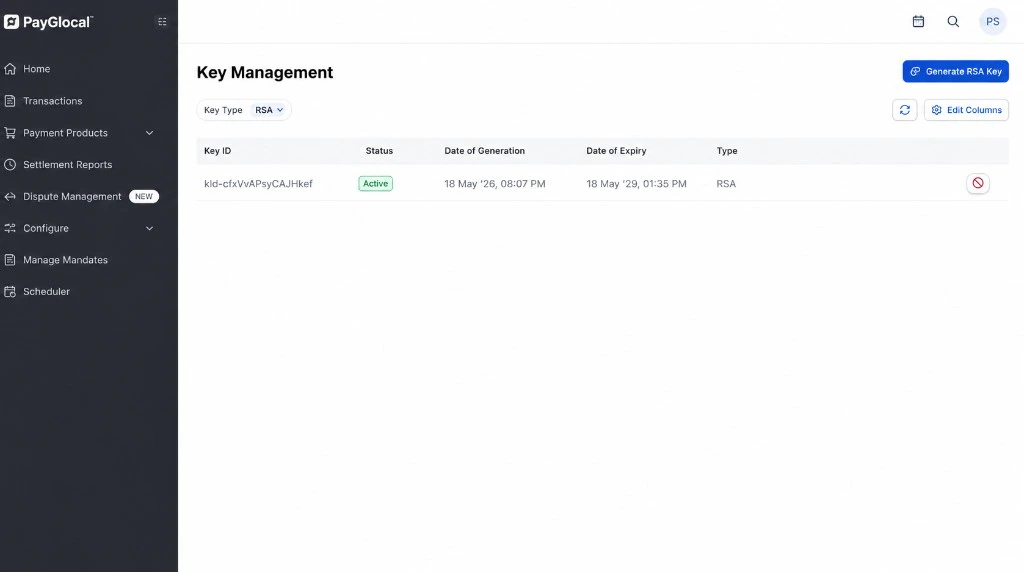
Copy the Key ID from the table
In the Key Management table, you’ll see your generated RSA key listed with its Key ID in the first column.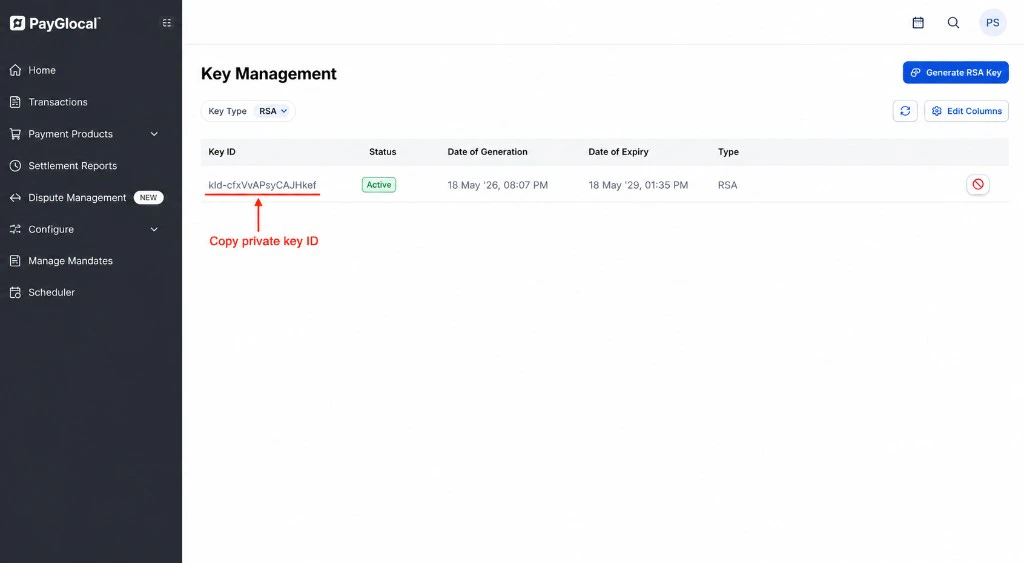
You can also extract it from the downloaded filename, which follows the pattern
<kid>_<mid>.pem: the part before the first _ is your Private Key ID, and the part after it is your Merchant ID (MID). The dashboard method is easier since the Key ID is already displayed.Public Key ID Example
Filename:Public Key ID:✅ Everything before the first
_Private Key ID Example
Filename:Private Key ID:✅ Everything before the first
_Quick Reference
| # | Credential | Where to get it |
|---|---|---|
| 1 | Merchant ID | GCC → Profile icon → My Account → TID Details → Payment Gateway |
| 2 | Public Key | GCC → Configure → Key Management → PayGlocal Common Certificate |
| 3 | Private Key | GCC → Configure → Key Management → Generate RSA Key |
| 4 | Public Key ID | Public key .pem filename — text before the first _ |
| 5 | Private Key ID | GCC Key Management table, or private key .pem filename — text before the first _ |
Next Steps
Key Management Deep Dive
JWS signing mechanics, key rotation, and environments.
Choose for Integration
Choose between No-Code and API integration based on how your business collects payments.