Documentation Index
Fetch the complete documentation index at: https://payglocal.mintlify.app/llms.txt
Use this file to discover all available pages before exploring further.
What is WooCommerce?
WooCommerce is an open-source plugin for WordPress that allows creating online eCommerce sites. The plugin is easy to set up and is being used by thousands of businesses around the world.WooCommerce with PayGlocal
Integrating your WooCommerce store with PayGlocal allows you to accept online payments securely through net banking and debit/credit card. Our WooCommerce plugin makes the PayGlocal integration seamless for the merchants.Before following the steps below, ensure you have a PayGlocal merchant account. Contact us to create one.
Plugin Download
Download the ZIP package based on your PHP version. If you are not able to see the package for your PHP version, kindly reach out to your account manager.Technical Requirements — PHP 7.0 or higher · WooCommerce compatible version · Minimum 25 MB free disk space.
Without Elementor
With Elementor
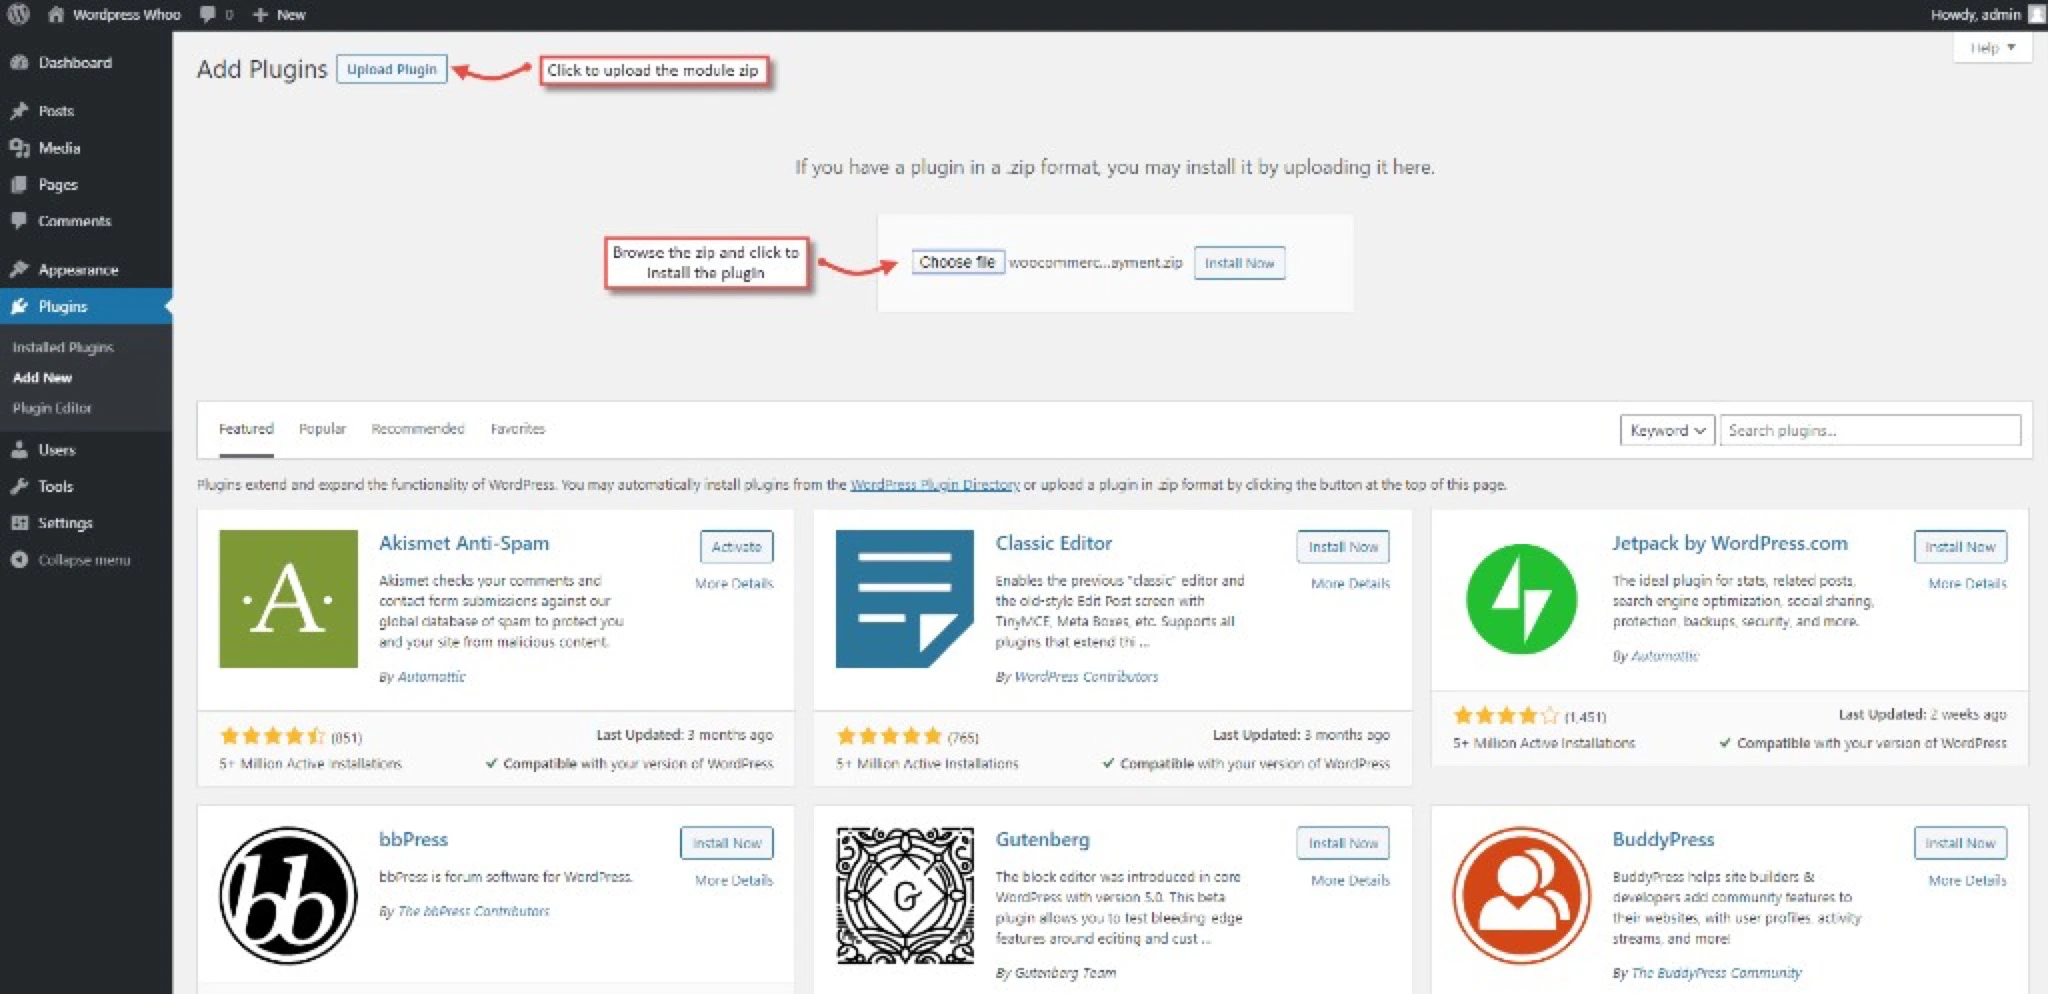
Plugin Installation
Follow the steps below to install the PayGlocal WooCommerce plugin and start accepting payments.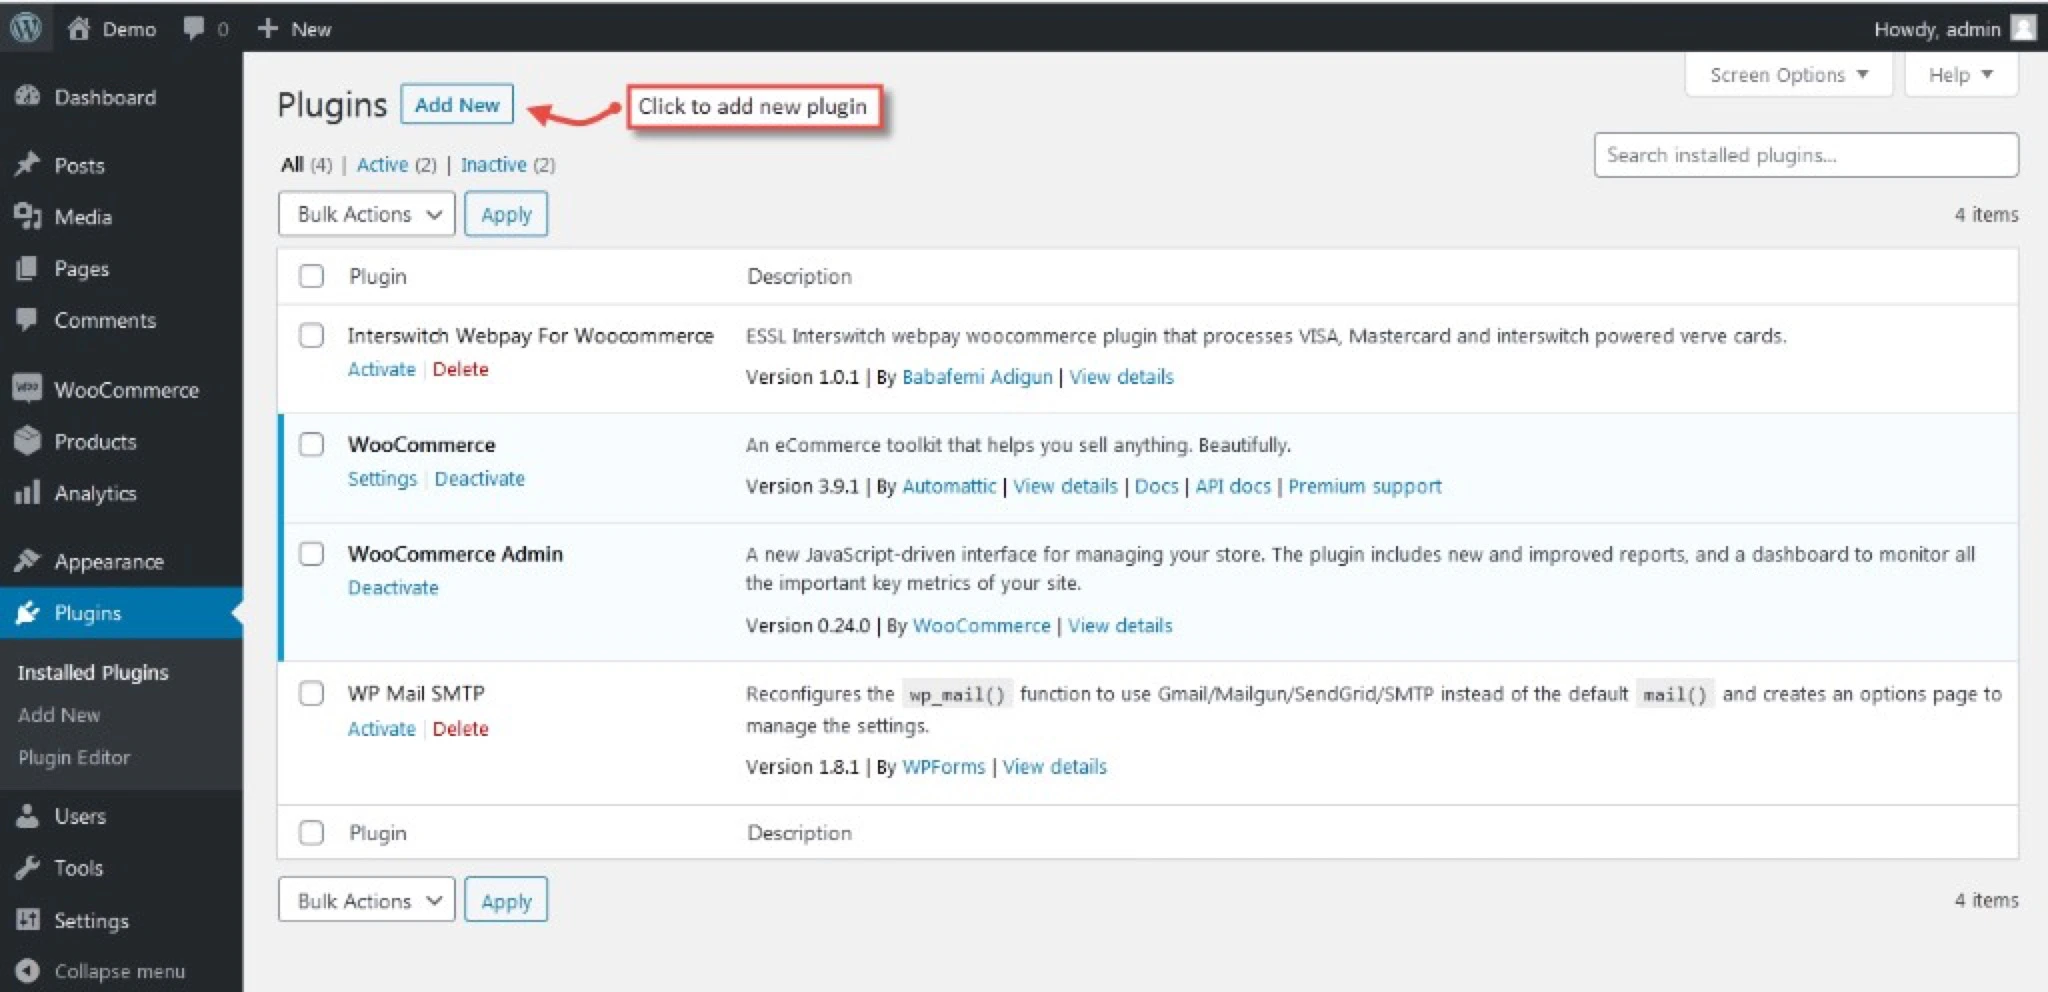
Configuration
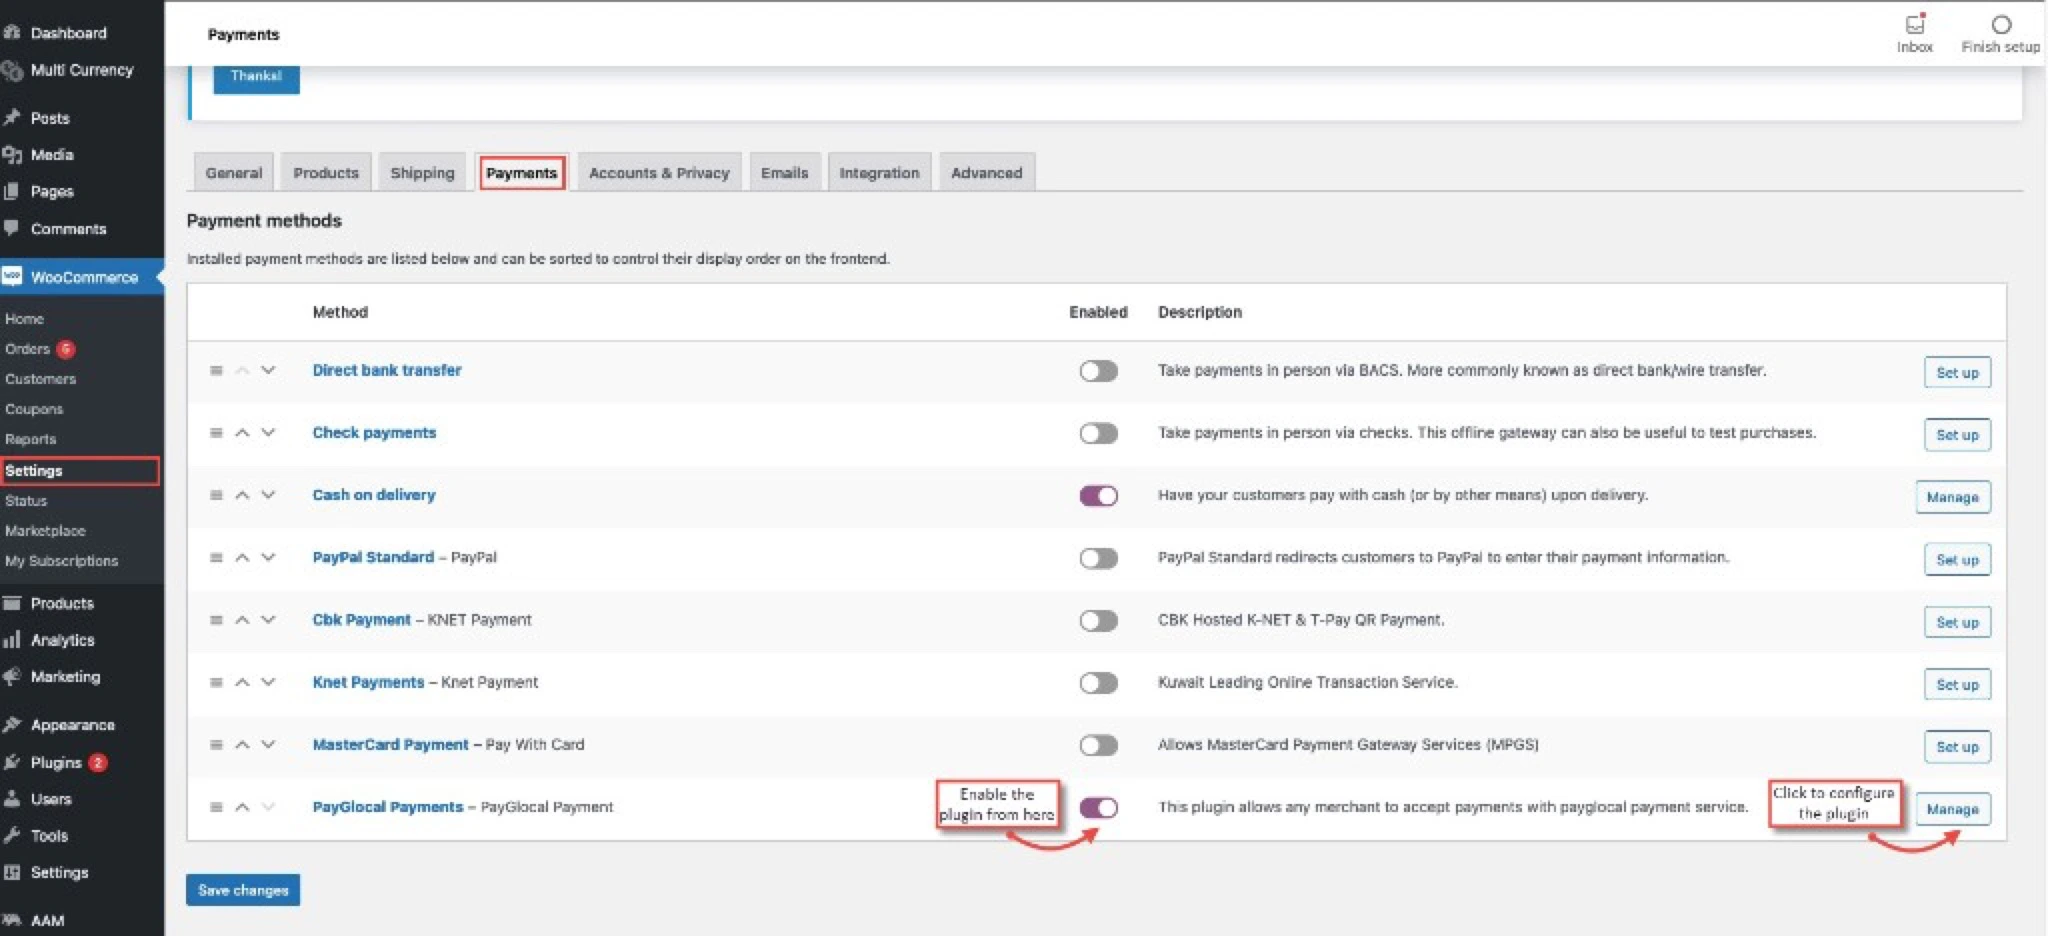
Enable PayGlocal in Payments settings
Go to Settings → Payments, find PayGlocal Payments in the list and enable it.
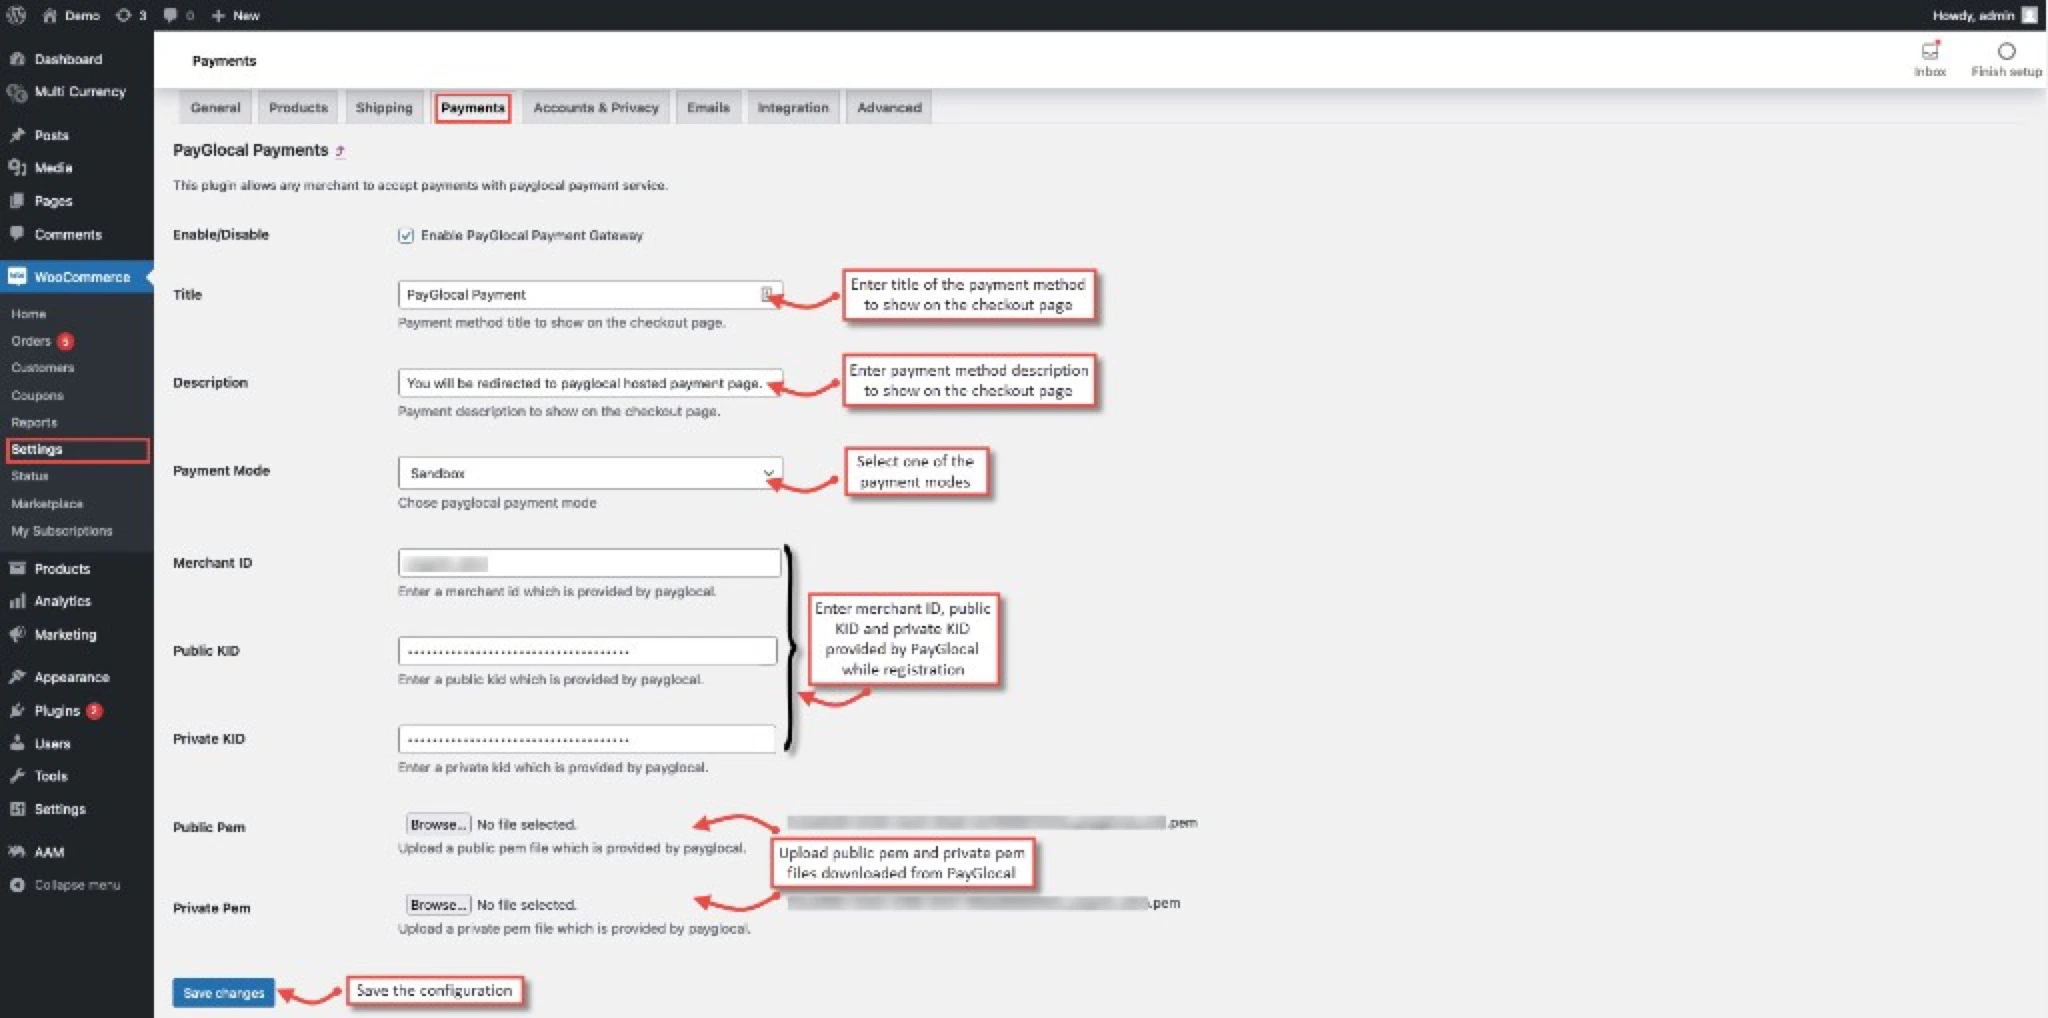
Field Reference
| Field | Description |
|---|---|
| Enable / Disable | Enable or disable the PayGlocal payment gateway. |
| Title | Custom title for PayGlocal payments shown to customers on the checkout page. |
| Description | Payment method description displayed to customers on the checkout page. |
| Payment Mode | Select Sandbox (for testing) or Production. |
| Merchant ID | Your Merchant ID from the PayGlocal dashboard — visible in the top bar when logged in. |
| Public KID | The Public Key ID provided by PayGlocal. |
| Private KID | The Private Key ID provided by PayGlocal. |
| Public PEM | Download the public PEM file from the PayGlocal merchant account and upload it here. |
| Private PEM | Download the private PEM file from the PayGlocal merchant account and upload it here. |
For details on fetching your Merchant ID, keys, and PEM files, refer to the Key Management section.
Setup Successful — After following the steps above, your WooCommerce store is ready to accept online payments from customers using PayGlocal.